
How Do You Make Biodynamic Compost on a Home Scale?
Build a genuinely hot compost pile first, then add the biodynamic preparations at the right stages. This fall guide gives you the pile size, layer thickness, temperature targets, turning schedule, curing time, and honest trade-offs for making finished compost in a home garden.
September 22, 2026
By Valeria Navarro
Is a hot pile the best way to make biodynamic compost at home?
Yes. For a home garden, I would build one hot pile and add the biodynamic preparations during the heating process rather than making a cold heap and hoping it sorts itself out. A pile at least 3 feet high and 3 feet wide, roughly 3 to 5 cubic feet, holds heat well enough to compost actively. NC State Extension describes the same minimum dimensions for a self-insulating hot pile.
That is the position. Hot first, preparations inserted with intention, then a quiet curing period.
A tiny basket of scraps will break down, but it will not behave like this pile. It loses heat too quickly. A pile larger than 3 cubic feet and smaller than 5 cubic feet is also identified as a fast, hot range by the City of Chilliwack.
Here in Austin, fall gives you a gift: dry leaves. Use them. In Miami, I learned to water sandy pots twice before lunch because the water disappeared. Central Texas clay is the opposite drama. It holds water, then turns hard, so moisture needs checking with your hand instead of guessing.
What should you gather for a fall biodynamic compost pile?
Gather enough dry leaves, shredded newspaper, or straw for 4 to 5 inch brown layers; fresh grass, kitchen scraps, and green plant material for 2 to 3 inch green layers; water; a breathable cover; a compost thermometer; and the biodynamic preparations. You need enough material to reach 3 feet high and 3 feet wide, or the pile will cool too fast.
Dry leaves are your fall backbone. Shred them if you can, because whole leaves mat together and slow airflow. Shredding costs time, but it is cheaper than buying a larger bin to compensate for a poorly structured pile.
Kitchen scraps are useful greens, but bury them inside the pile instead of leaving them on top. Fresh grass is nitrogen-rich, yet thick clumps can become slimy, so spread it in a thin 2 to 3 inch layer.
A tarp keeps heavy rain from saturating the pile, but a sealed plastic cover can trap excess water and reduce airflow. Choose breathable fabric or a cover that protects from rain without wrapping the heap like leftovers.
Use the plant database if you are deciding which spent annuals and garden trimmings belong in the mix. Diseased or heavily seeded material deserves caution, because a home pile can miss its temperature target.
How do you layer the browns and greens?
Start with a 4 to 5 inch layer of carbon-rich browns, add a 2 to 3 inch layer of nitrogen-rich greens, and repeat those proportions until the pile reaches at least 3 feet high. Moisten each layer so the finished pile feels like a wrung-out sponge, not a dripping mop. That structure gives the hot pile carbon, nitrogen, moisture, and air in workable balance.
Begin with browns on bare ground or inside a compost bin. Dry leaves, shredded newspaper, and straw all count as browns in this method. Newspaper is convenient, but shredding it is another chore, and too much paper can make the pile dry and papery.
Add greens next. Kitchen scraps, fresh grass, and green plant material are the listed choices here. Keep the green layer 2 to 3 inches deep, because a thick wet layer can collapse air spaces and create a sour pocket.
Repeat the sequence. Four to five inches of browns, then two to three inches of greens. If you have only a small amount of greens, do not make a tall pile yet. Collect more material first, because a short pile will not retain enough heat.
Everyone says compost needs water. In practice, too much water is the faster way to ruin a home pile, especially over Austin clay, because wet materials crowd out air and the center stops heating cleanly.
How wet should a biodynamic compost pile be?
Keep the pile slightly damp throughout active composting, with the texture of a wrung-out sponge. Materials should hold moisture without releasing a stream when squeezed. If the pile is dusty and cool, add water while turning; if it is soggy or smells sour, add dry browns and turn it to restore air.
Moisten as you build, not only after the pile is finished. Watering each layer helps the center stay active, while a single heavy soaking can leave the outside wet and the core dry.
Check the center with your hand when you turn it. Do not trust the surface. Fall wind can dry the outside while the middle stays wet, and a rainstorm can reverse that in one afternoon.
The trade-off is attention. A hot pile is faster than a neglected heap, but it asks you to check moisture every few days, especially during a dry Austin November.
When should you turn and measure the pile?
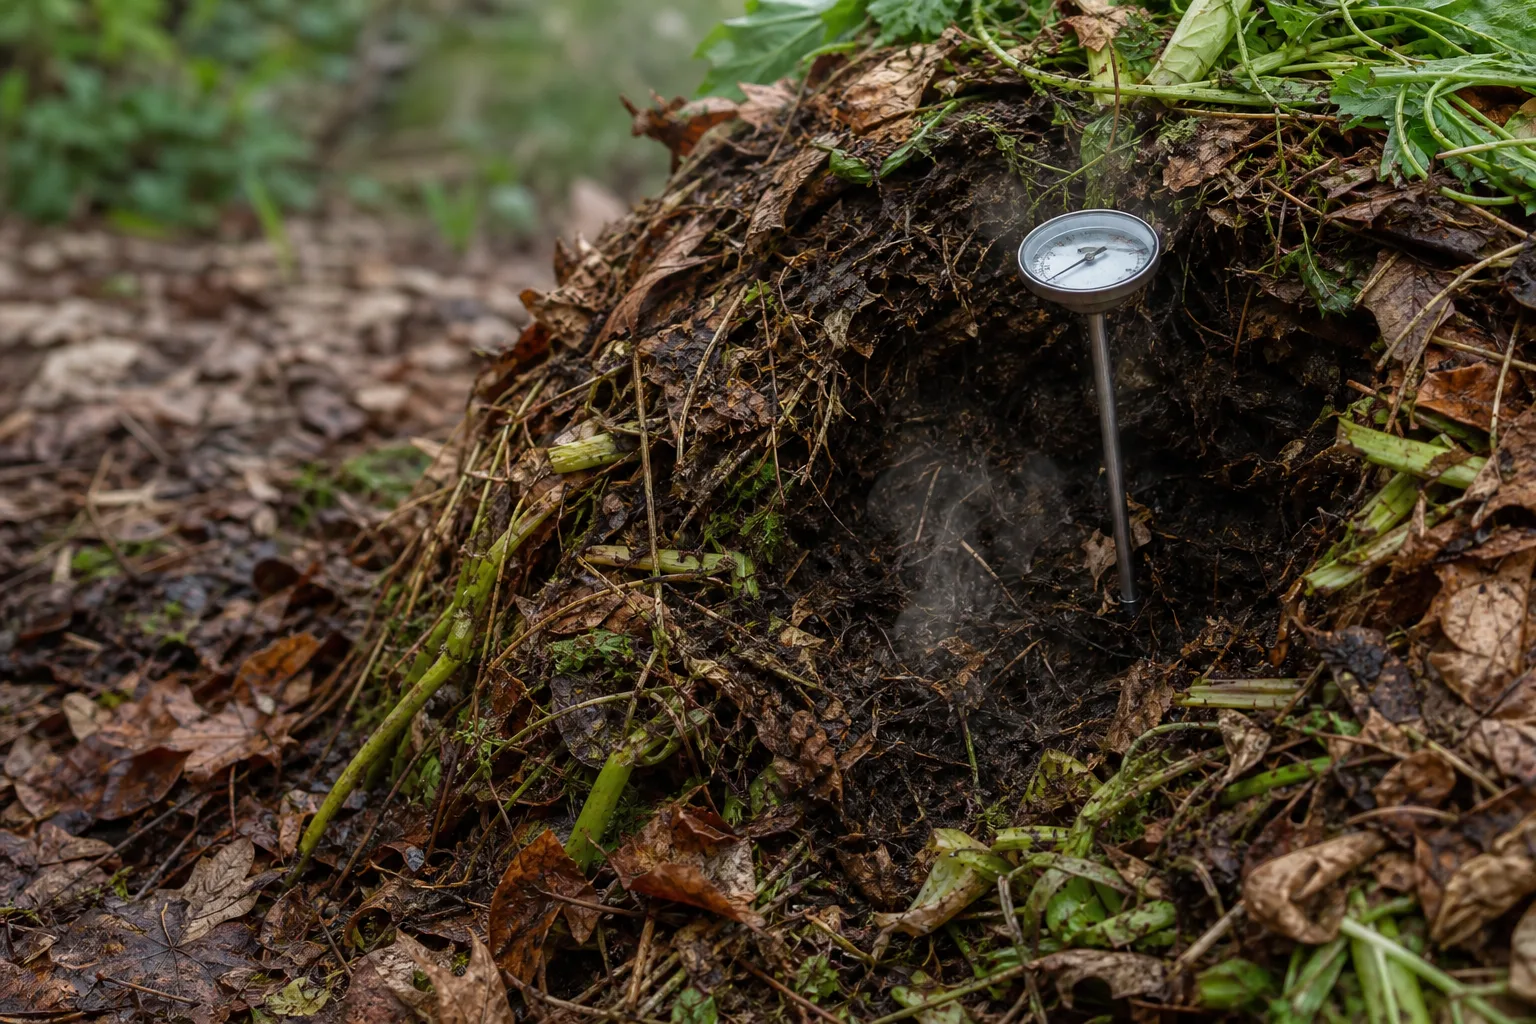
Put a compost thermometer into the core and turn the pile every 2 to 3 days so fresh material reaches the warm center and air moves through the heap. Aim to keep the center between 130°F and 150°F. Temperatures above 130°F help kill pathogens, while temperatures above 140°F destroy most weed seeds, according to the supplied composting guidance.
Take the reading in the middle, not at the edge. The outside can feel cool while the center is working, and a surface reading can make you turn too often or too late.
Turn with a fork by moving the outside material inward and the center material outward. That is work, yes. It is also how you stop one hot pocket from doing all the composting while the rest sits there looking innocent.
Do not chase the highest number. A pile that reaches 150°F has plenty of heat, but overheating and drying are not trophies. If the thermometer spikes above the working range, turn it and check moisture.
| Home compost approach | Useful range or timing | Honest downside |
|---|---|---|
| Hot biodynamic pile | 3 to 5 cubic feet, 130°F to 150°F, turn every 2 to 3 days | Requires enough material, regular turning, and temperature checks |
| Cold or continuous pile | Add material as it becomes available | Usually heats less evenly because new scraps are added at different stages |
| Worm bin | Small-scale food-waste composting | Does not replace a hot yard-waste pile for heat treatment |
When do you add the biodynamic preparations?
Add diluted preparations 500 and 501 in water and spray them over the pile when its temperature spikes. After the first turn, incorporate small amounts of preparations 502, 503, 504, and 505 into the pile. The trade-off is that this biodynamic sequence adds handling and timing, so it is not the simplest method if your only goal is fast compost.
Preparation 500 is horn manure, and preparation 501 is horn silica in the supplied method. Dilute both in water before spraying. Use a light, even application over the pile rather than dumping concentrated material in one spot.
After the first turn, add small amounts of 502, cow manure; 503, cattle slurry; 504, plant juice; and 505, orbicularis. The names and sequence matter here, so label your containers before you begin. A rushed bucket swap is how garden projects become family folklore.
I would not add the preparations before the pile has shown a heat spike. Build the compost conditions first. The biodynamic part belongs inside a functioning hot process, not in place of carbon, nitrogen, moisture, and air.
How long should biodynamic compost cure after heating stops?
When the pile stops heating, cover it with a fabric weed barrier and let it cure for 6 to 12 weeks. Mist it occasionally so it stays slightly damp, and turn it a few times during curing to let air back in. The compost is ready when it is within 10°F of ambient temperature, dark brown or black, and the original materials are no longer recognizable.
The cooling stage is not a failure. Active heating has ended, and the material needs time to settle into finished compost. Covering it with fabric weed barrier protects the curing pile while still allowing a manageable home process.
Check it every couple of weeks. If it is dry, mist it lightly. If it is compacted, turn it. Do not soak it, because a curing pile still needs air and should remain only slightly damp.
Six weeks is the short end of the range. Give it closer to 12 weeks if recognizable leaves or food scraps remain, or if the pile has stayed cool and uneven.
How do you know the compost is ready for the garden?
Finished biodynamic compost should be within 10°F of the outdoor ambient temperature, dark brown or black, and unable to reveal its original leaves, scraps, or grass. If it is hot, visibly raw, or full of recognizable material, let it cure longer. Finished compost is a steady soil amendment, not a warm pile in disguise.
Use your thermometer first. Compare the compost temperature with the surrounding air, then inspect the texture and color. The temperature test protects you from spreading unfinished material simply because the calendar says six weeks.
A dark color alone is not enough. A pile can look dark on the outside while the middle contains raw material. Turn it once more and check several handfuls from different areas.
For the home garden, the City of Chilliwack guidance says to mix 2 to 5 inches of compost into vegetable and flower beds. That is a useful starting range, but do not bury unfinished compost around current crops just to use it up.
Who is a hot biodynamic compost pile for, and who should skip it?
This method suits a homeowner with enough fall leaves and green material to build a 3 foot by 3 foot pile, room to turn it every 2 to 3 days, and patience for a 6 to 12 week cure. Skip it if you produce only a small bowl of scraps, cannot monitor temperature, or want a no-work container that accepts material whenever you remember.
It is especially useful for someone clearing autumn leaves while also pruning spent garden growth. A hot pile turns that seasonal rush into one batch with a clear start, active phase, and curing phase.
A continuous pile is more forgiving about daily scraps, but it mixes young and old material together. The hot biodynamic batch loses on convenience. It wins on control, because you know when the pile was built and when the heat began.
You can also use a purchased insulated tumbler, but the container costs more and still does not excuse poor moisture or inadequate material volume. Diego and I disagree about gravel often enough; on this, I am firm. The compost thermometer matters more than a fancy bin.
Can you make biodynamic compost in fall and use it this season?
You can build the pile this fall, but you should not expect finished compost immediately. A hot pile needs active heating first, then 6 to 12 weeks of curing after heating stops, so a pile started in October may finish in December, January, or later depending on its temperature and condition.
Start with the leaves already on the ground. Keep adding greens until you can build the full 3 foot height, rather than making a shallow pile and calling it finished.
Austin can still have warm days in fall, but cold nights slow the process. The pile itself must create and retain heat, which is why the 3 foot minimum matters.
If you need amendment for a bed this weekend, use finished compost you already have. Do not rush unfinished material into the soil because the garden calendar is impatient. Mine is too, especially when I am planning what to cook, but the compost gets the final say.
What are the most common questions about home-scale biodynamic compost?
The questions below cover the practical decisions that determine whether this method works: pile size, layer ratios, heat, preparations, curing, and readiness. Each answer is direct because you should be able to stand beside the pile with muddy gloves and find the next move quickly.
How big should a home biodynamic compost pile be?
A home biodynamic compost pile should be at least 3 feet high and about 3 feet in diameter, roughly 3 to 5 cubic feet. That volume helps the pile retain heat. A smaller heap may decompose, but it cools faster and is less reliable for a hot composting process.
What brown-to-green layers should I use?
Use 4 to 5 inches of carbon-rich browns followed by 2 to 3 inches of nitrogen-rich greens, repeating the pattern until the pile is built. Browns include dry leaves, shredded newspaper, and straw; greens include kitchen scraps, fresh grass, and green plant material. Keep the layers moist, not soggy.
What temperature should biodynamic compost reach?
Keep the core between 130°F and 150°F during active heating. Temperatures over 130°F help kill pathogens, while temperatures over 140°F destroy most weed seeds. Measure the center with a compost thermometer, because the outside of the pile can be much cooler than the working core.
When should I add biodynamic compost preparations?
Add diluted preparations 500 and 501 in water and spray them over the pile when the temperature spikes. After the first turn, incorporate small amounts of 502, 503, 504, and 505. Add them to an already functioning hot pile, because the preparations do not replace the basic needs for carbon, nitrogen, moisture, and air.
How long should biodynamic compost cure?
Let biodynamic compost cure for 6 to 12 weeks after the pile stops heating. Cover it with a fabric weed barrier, mist it occasionally to keep it slightly damp, and turn it a few times. Extend the curing period if the compost remains hot or recognizable materials are still visible.
How do I know biodynamic compost is finished?
Biodynamic compost is finished when it is within 10°F of ambient temperature, dark brown or black, and the original materials are unrecognizable. Check several areas of the pile rather than judging only the surface. If it is still hot or visibly raw, keep curing it instead of applying it to garden beds.
If you want help choosing the pile location, size, and surrounding planting, you can get a concept for your yard before you start moving leaves around. A little planning saves a lot of fork work.
Want a plan for your own yard?
Tell us the space and we will put a planting plan together for it. Start at get my concept, or browse what actually grows where you are over on plants.
Frequently asked questions
How big should a home biodynamic compost pile be?
A home biodynamic compost pile should be at least 3 feet high and about 3 feet in diameter, roughly 3 to 5 cubic feet. That volume helps the pile retain heat. A smaller heap may decompose, but it cools faster and is less reliable for a hot composting process.
What brown-to-green layers should I use?
Use 4 to 5 inches of carbon-rich browns followed by 2 to 3 inches of nitrogen-rich greens, repeating the pattern until the pile is built. Browns include dry leaves, shredded newspaper, and straw; greens include kitchen scraps, fresh grass, and green plant material. Keep the layers moist, not soggy.
What temperature should biodynamic compost reach?
Keep the core between 130°F and 150°F during active heating. Temperatures over 130°F help kill pathogens, while temperatures over 140°F destroy most weed seeds. Measure the center with a compost thermometer, because the outside of the pile can be much cooler than the working core.
When should I add biodynamic compost preparations?
Add diluted preparations 500 and 501 in water and spray them over the pile when the temperature spikes. After the first turn, incorporate small amounts of 502, 503, 504, and 505. Add them to an already functioning hot pile, because the preparations do not replace the basic needs for carbon, nitrogen, moisture, and air.
How long should biodynamic compost cure?
Let biodynamic compost cure for 6 to 12 weeks after the pile stops heating. Cover it with a fabric weed barrier, mist it occasionally to keep it slightly damp, and turn it a few times. Extend the curing period if the compost remains hot or recognizable materials are still visible.
How do I know biodynamic compost is finished?
Biodynamic compost is finished when it is within 10°F of ambient temperature, dark brown or black, and the original materials are unrecognizable. Check several areas of the pile rather than judging only the surface. If it is still hot or visibly raw, keep curing it instead of applying it to garden beds.
Free, no obligation
Ready to design your dream landscape? Start here.
Tell us where you are and we will start a free profile for you, with plants that actually survive your climate and a real sense of what the build would cost.